


Where to Locate Your Home Food Store?
Before storing food and supplies, you'll need to select a place that will best meet the criteria for appropriate conditions, relative convenience, and sufficient space. Look around your home and property. Find a room that you can dedicate as your home food store, or in which you can make space for your store.
Finding the Best Conditions for Food Storage
Store your food in a cool, dry place away from sunlight that stays a constant temperature, between 40 and 60 degrees F. this is important because hot or cold fluctuations in temperature can destroy the nutritive value of the food and shorten its shelf life.
Find the coolest place in your house. This will usually be in your basement ( if you have one), but preferably away from a furnace room or other heat source. Freezer, refrigerators, furnaces, and water heaters should not be located in this room because they all give off heat, increasing the room temperature.
Other good locations are root cellars, insulated and heated garages ( where the temperature stays constant between 40 and 60 degrees F), spare bedrooms, unfinished rooms, crawl spaces, closets, under stairways, or under beds. North walls are cooler because they are away from sun exposure.
The room you chose should stay dry at all times. If your clothes dryer is located in this room, be sure it is properly ventilated to prevent moisture from gathering on the food.
Choosing Your Most Convenient Space
Remember: The closer you can locate your food storage area to your kitchen, the easier you will find it to rotate the food storage. The following are some locations you might want to consider in your home food store.
The Basement
If you are lucky enough to have a basement, you will find that the temperature is usually cooler, ideal for storing food. Keep all food away from dryer vents or furnaces, which give off moisture that can rust your cans.
Under the stairways
There is usually a lot of wasted space under a stairway since the sloped ceiling makes it inappropriate for a living area. Shelves can be built that will hold your food storage such as canned goods, large buckets, as well as camping equipment, 72-hour kits, medical supplies, and so on. Hint: Try installing hooks from the ceiling to hold your 72-hour backpacks.
Closets
A pantry can be made out of a closet. You'll be amazed at how much a closet will hold when the shelving is installed properly. Be sure to measure all your boxes or cans so you can make the shelving just the right size to hold your food storage items without leaving any more wasted space than necessary. I like to build the first shelf high enough off the floor (or ground) so several six gallon buckets can be stored underneath. I keep all my bulk food such as rice, beans, sugar, flour, wheat, pasta, and dried potatoes in buckets so I can easily slide them out, take what I need, and use it.
The Garage
If the temperature in your garage fluctuates between freezing in the winter and hot in the summer, then your garage isn't the best place for food storage. Food retains it nutritive value approximately 50 percent longer when it stays at a relatively constant temperature than when stored in extremely uneven temperatures.
However, a garage is a great place for all other short-term emergency equipment and kits, as well as nonfood items such as extra toilet paper and paper towels. If your garage temperature goes below 32 degrees F in the winter, you can store grain and beans there because the freezing temperatures will kill bugs.
The Attic
Do not store food in your attic if it heats up in the summer (most attics do). The food will spoil quickly in hot temperatures. If your attic is vented and insulated and stays a fairly constant temperature, it will be just fine. Remember, however, that the farther away from the kitchen the food is stored, the harder it will be for you to get to and rotate. If your attic is fairly close to your kitchen and easily accessible by stairs or a pull-down ladder, it may work just fine for you.
The Utility Room
If large enough, your utility room may well double as a room for food storage. Shelves can be built above the washer and dryer to store extra laundry soap, bleach, and other cleaners. I had two feet of wasted space along one wall in my utility room, so I had shelves built along the entire wall. The top shelf holds all my canning and sprouting equipment, wheat grinder, juicer and large roasting pans, along with extra blankets, pillows, sleeping bags, and more.
The side shelves were built to hold all my spices, which I buy in bulk and store in plastic containers, as well as my gallon-sized containers of food. The center has two rolling self-feeding units that hold twenty cases of canned goods. They can be pulled in and out to stock the shelves from the back. I love my utility room now; it is very organized and holds a lot of food and food-preparation equipment. In addition, it's close to my kitchen, which makes it convenient for me to rotate and use foods stored there.
The Kitchen
My kitchen cupboards are full of clear plastic containers, such as those made by Rubbermaid or Tupperware. I put the food that I use often in these containers. The contents of a gallon-size (#10) can will fit just right into these plastic containers and the containers fit nicely on our kitchen shelves. Although they're clear and we generally can see what's in them at a glance, I still label the fronts so I know exactly what's in each container and date it so I know precisely when it was opened. It is best to use darker containers, which block more light than clear or neutral-colored containers. You can purchase dark plastic containers for bulk food storage items and spices through some of the food storage supply companies listed in the Resource Guide.
If you live in a small house where space is very limited, that doesn't mean you can't prepare for at least short-term emergencies by storing extra food and supplies. Because you will probably want to disguise your stockpile the best you can, I've included some suggestions that will make your stash practically invisible- and sometimes even practical or decorative! You can use your own imagination to come up with clever disguises. Here are a few ideas for food storage when extra space is scarce.
Under the Bed
Because the space under most beds is usually empty, it can be a good place to store cases of food storage, which hold six #10-size cans. Case goods from the grocery store, such as green beans and corn, fit nicely under beds also.
You can either just slide the cases under the bed frame or put the mattress right in top of the boxes. Because cases of cans stack nicely, you could create a large stockpile of canned goods under a single mattress. To disguise, simply cover the boxes with a dust ruffle. Be sure to label each box with what is in it, and keep a master list of what you have and where it is stored. Only store the items that you won't be using in the near future, as the more out of the way the storage space is, the harder it will be to get to.
In Bookcases
You can also use #10 cans to make bookshelves or shelves to store more cans of food. Put a board across four cans (two at each end) and stack more cans on top of the boards. ( If the board is long enough to sag under the weight of additional cans, add another #10 can or two in the middle for additional support). Keep doing this until you feel your shelf is tall enough yet still stable.
As End Tables and Coffee Tables
A five - or six bucket can become an attractive end table. Place a round piece of wood on top of the can, cover it with a tablecloth or piece of fabric, and you have created a piece of furniture !
You can also place food storage items inside a trunk or antique chest that you can then use as a coffee table.
2) What and How Much Food Storage you should have?
Do you know how much food you need for 1 year.
Click here to use our Food Storage Calculator
3) How to Store Food Storage?
How to Store Bulk Food Storage items - Storage Containers
Select only the best food grade containers that will exclude light oxygen and moisture. This will greatly extend the shelf life of your food.
5 or 6 Gallon Plastic Buckets or Pails
These buckets have tight fitting lids with rubber gaskets. They are ideal for large quantities of grains, beans, legumes, sugar, flour, etc. you can purchase an inner liner that is made from metalized foil. This liner will keep the light from harming the food and causing it to deteriorate. It also acts as a moisture barrier and keeps rodents out. The bucket with the metalized liner is a very good method of storing food. To seal the Mylar liner, line the bucket with the bag and fumigate with either the dry ice method or nitrogen flushing or oxygen absorber packets. Then get out as much air as possible. Lay the bag flat and use an iron to heat seal the end of the bag, this way you can use the bag over and over again. Pierce a hole in the corner of the bag, hold the bag below the seal so you don't suck up the contents of the bag. Suck all the air out with the hose or a smaller attachment to the vacuum that can be inserted into the end. When the air is sucked out and the bag looks vacuum packed, hold the end and seal it with an iron. Do not let air back into the bag.
Note: Never use buckets that have contained chemicals, paint, sheet rock mud, etc. Restaurant food grade containers are ok, wash them well and rinse with bleach and water.
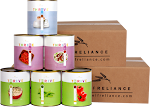
#10 Size Double Enamel
The #10 size cans hold approximately 1 gallon and are ideal for smaller quantities of food. You can purchase plastic lids to put on the cans after they are opened. Most food storage companies use these types of containers. They are nitrogen packed with an oxygen absorber packet sealed inside the can. These packets absorb free oxygen from the air around them and chemically bind it. This removes the oxygen from inside the can, which helps prevent insects from hatching or even living. This also prevents rancidity from occurring. The atmosphere inside the can is mostly nitrogen, which is ideal for long term food storage. If the oxygen level is below 2%, the food will stay good for a lot longer. If you have access to a cannery you may choose to can your own food.
Mylar Bags
The ones previously mentioned can be purchased from only food storage companies. The heaviest Mylar bags in the large size are the best for lining the buckets. The bag can be sealed with a hot iron. Oxygen packets can be inserted before sealing. These bags are good gas barriers and will not allow the nitrogen or CO2 to escape through the porous walls of the plastic.
Oxygen Absorber Packets
They look like a tea bag or sugar packet. This method is a relatively new procedure and is proving to be one of the best methods. They must be used up with in fifteen minutes of being opened and exposed to the air. These packets absorb the oxygen from the container and trap it in the iron powder, salt and moisture mixture. This is the safest way to remove oxygen these can also be purchased from food storage companies.
The Dry Ice Method
Place about three inches of food on the bottom of the Mylar bag that is inside a plastic bucket. Then place a three-inch square of dry ice on top of the food. Fill the bucket about half full and allow thirty minutes to two hours for the ice to dissipate. Lay the lid on loosely so the gas can escape. Then seal the bucket tightly. One pound of dry ice is used for a thirty-gallon drum of wheat. If the container bulges, take the lid off and let the gas out. Then seal it again.
CO2 and Nitrogen Flush Method
A welding shop will rent you a CO2 tank and nitrogen gas. This can be used instead of the dry ice method. Just flush the food with the gas making sure to get the hose down into the bottom of the container after the food has been put in. sometimes especially with flour, it can spray all over, be careful.
Bay Leaves Method
Bay leaves can be spread throughout the container. Two bay leaves for small amounts up to one gallon or five leaves in buckets. Some people say this works well for them.
Freezing Grain Method
If your buckets of grain are places in the garage for winter, the freezing temperatures will probably kill any weevil that is present. You can also deep freeze grain in ten-pound bags and leave it for a week to kill the bugs.
Diatomaceous Earth Method
Diatomaceous Earth can be mixed into your stored grains and beans to control insects without to remove the dust before consuming it. For every forty pounds of grain or bean, you mix one cup of diatomaceous earth with it. Coat every kernel and mix it in small batches. Cover your mouth so you don't breath the dust in, it can irritate your lungs. The diatomaceous earth you want to use is sold as an organic garden insecticide. There are several different types of DE. Make sure you get the kind that is approved for human consumption, and not the swimming pool type.
Hint: Two liter pop bottles can be used to store grain, rice, beans, etc. for short-term usage. They stack on the shelves and you can see what is in them. Other plastic containers work: Ketchup, Gatorade bottle work.
Shelf Life
Even when you do everything to ensure that your food is protected from the elements and insects, food storage will eventually lose its freshness if left on the shelf too long. Therefore, it's important that you first understand the concept of shelf life. Foods are considered to have a life time during which they remain suitable for use, and after which they are not recommended for human consumption.
When food is stored too long, two things happen: the nutritional value breaks down, and the color, flavor, texture, and smell change to the point that most people will not want to eat it.
Do not allow food storage to surpass its shelf life so you must throw it away. Rotate your food and use it within the estimated period of time determined by research done on each product. For example, dehydrated dairy products and eggs will store approximately seven to ten years; freeze dried foods will store approximately 25 to 35 years; dehydrated fruits and vegetables will store ten years; and grains, beans, and legumes will store ten years or more. Wheat can store up to twenty years or longer. Commercially canned foods should be rotated within two years. However, these rules apply only when foods have been properly canned and sealed with low oxygen content, and are stored at the ideal temperature.5) Rotation and Deterioration of Food Storage
Causes of Deterioration and Spoilage
In addition to its limited shelf life, food is susceptible to deterioration and spoilage that results from a variety of natural causes. The following are a few of the most common problems that result in food expiration before its estimated shelf life.
Oxygen
Oxygen will rob food of its nutritive value. All living food contains enzymes that, when exposed to oxygen, start to break down the food by a process known as oxidation. Nutritive value is lost little by little as food breaks down. That is why it is important to remove the oxygen from the containers before you seal them. It's also good to store grains a whole rather than cracked grain. Once the kernel is ground, it starts to lose it nutritive value and the rancidity process begins.
Bacteria
Bacteria, yeast, and molds are controlled by several methods: processing, canning, dehydrating, drying, or freezing. Bacteria is the most common cause of spoilage, so it is important to make sure all food is properly processed, by whichever method you choose. Once containers of processed beans, meat, vegetable, and other foods are opened and cooked, you must quickly use up the food to prevent spoilage. For example, wet-packed beans that have retained their food value in a vacuum-sealed can for two years will spoil within a matter of days once the can has been opened. Always refrigerate wet-packed foods ( those packed in water, juice, or other liquid) once they have been opened.
Insects
Insects grow in food because the eggs or larvae are either already in the product before it is packaged or able to get inside improperly sealed packages.
The most common insects found in foods are ants, roaches, earwigs, moths, silver fish, beetles, and weevils. They not only get into the food, but they eat it, deposit their waste products in it, and lay eggs in it. The eggs then hatch and result in infestation.
Light
As you collect containers for your bulk food storage, try to get ones that are dark and cannot be permeated be light. The two containers that most commonly allow light are glass jars ( or bottles) and plastic buckets. If you use glass or light-colored plastic containers, you should store them in heavy cardboard boxes or in a dark room.
Temperature
A cool dark place is a must for food storage. The temperature of the room should stay relatively constant throughout the year. The ideal temperature is between 40 and 60 degrees F, which is the range of most basements. If the temperature is higher than 60 degrees, it will slightly cut down the shelf life of your food storage. If you store your food in a garage, shed, or attic where the temperature fluctuates from very hot to very cold, you could be cutting down the shelf life of your food to half the time listed on the shelf-life chart.
Humidity and Moisture
Humidity and moisture promote the deterioration of most foods. Which is the principle behind dehydrating foods. Because the moisture level of dehydrated foods should remain under 10 percent, they store best when the moisture is removed from the air do they won�t prematurely rehydrate and spoil. Dehydrated food will be hard, but should not be leathery.
Be sure to keep all containers up off the floor and away from anything that tends to raise the humidity level, such as dryer vents, water heaters, or anything that could flood ( such as a clothes washer, dishwasher, sink or shower) and damage the food.
Prevention of Deterioration and Spoilage
Besides avoiding the elements that result in food deterioration, you can take additional steps that will further retard spoilage. You can use any of several methods, depending on what food you are storing, what containers you are using, and what food storage problems you are most likely to face.
Oxygen Absorber Packets
Oxygen absorber packets look like tea bags or sugar packets. This relatively new procedure for retarding spoilage is proving to be one of the best methods. These packets absorb the oxygen from the container and trap it in the iron powder and salt mixture. This is the safest way to remove oxygen. After inserting the oxygen packet into your container, seal the container properly.
Note: Oxygen absorber packets must be used up with in the fifteen minutes of being opened and exposed to the air. If you have several packets left after opening a bag of them, put them in a glass jar with a tight-fitting lid as soon as possible to keep them from absorbing the oxygen form the air . These packets can be purchased from any food storage companies.
Dry Ice Method
Another effective method of removing oxygen from food containers is to place a Mylar bag inside a plastic bucket. Add about 3 inches of food inside the mylar bag then place a 3-inch square of dry ice on the top of the food. Fill the bucket about half full and add another piece of dry ice. Fill the bucket full and allow thirty minutes to two hours for the ice to dissipate, forcing the oxygen out as it does so. Lay the lid loosely so the gas produced by the dry ice can escape. Then seal the bucket tightly. One pound of dry ice is used for a 30-gallon drum of wheat, and one-sixth of a pound of dry ice is used for s 5-gallon bucket of wheat or grain. If the container bulges, take the lid off to let the gas out. Then seal the container again.
CO2 or Nitrogen Flush Method
A method that you might use instead of the dry ice method is the CO2 method (also called nitrogen flush). A welding shop will rent you a CO2 tank and nitrogen gas. Just flush the food with the gas, making sure you get the hose down into the bottom of the container after the food has been put in it. Sometimes, especially when you're sealing containers of flour, the food can spray all over, so be careful.
Again, the nitrogen pack method and oxygen absorbers will remove the oxygen and prevent insects from living. Because they can't breathe without oxygen, the larvae die before they even hatch.
Bay Leaves Method
Placing bay leaves into your grain and spreading them throughout the container is another popular method of discouraging bug infestation. Because bugs don't like the smell of bay leaves, they are deterred from getting into the food. Two bay leaves per gallon or ten leaves spread throughout a 5-gallon bucket are enough to effectively do the job. Bay leaves laid inside food storage cupboards will discourage bug infestation there as well.
Freezing Grain Method
If you live in an area where winter temperatures drop below freezing, you can probably kill any weevil that is present by placing your buckets of grain in an unheated garage or other storage area for the winter. You can also deep-freeze grain in 10-pound bags and leave it in you freezer for a week to kill any bugs. After you take the grain out of the freezer, if any moisture appears to have gotten into it, let the grain dry then seal it in the proper containers.
Diatomaceous Earth Method
You can also mix diatomaceous earth into your stored grains and beans to control insects without having to remove the dust before you consume the food. The diatomaceous earth you want to use is sold as an organic garden insecticide and is not harmful when ingested. Warning: There are several types of diatomaceous earth. Make sure that you get the kind that is approved for human consumption rather than the swimming pool type, which contains harmful chemicals.
For every 40 pounds of grain or beans, mix one cup of diatomaceous earth with it. Mix it in small batches to be sure it coats every kernel. Cover your mouth and nose so you don't breathe the fine dust because it can irritate your lungs.
Using the Right Food Storage Containers
The very best way to protect your stored food is to start with the right food storage containers. They must be food-grade containers that will exclude light, oxygen, and moisture. Such containers will also protect your food from infestation of insects such as weevils and black sugar beetles.
How do I use the food?
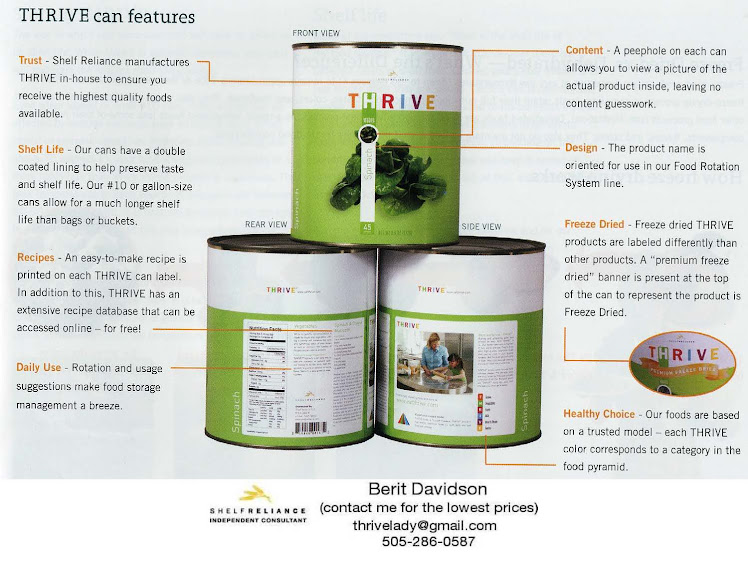
There are more recipes than you can imagine on the Shelf Reliance website, specifically made for THRIVE foods. If you haven't yet tasted the high quality, contact a consultant (thrivelady@gmail.com) to taste some foods. I am confident you and your family will love it!
We’re not saying stop shopping at your local grocery store, we’re saying to reallocate some of that grocery budget from the ordinary canned food to these great, nutritional THRIVE foods, and incorporate them into your everyday cooking.”
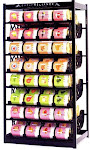
You can’t go wrong with a SR Food Rotation System, especially at party pricing! They’re easy to use, fully adjustable to any can size, very durable, and keep your food properly rotated so it doesn’t go bad. They work for both THRIVE cans and ordinary cans.
7) The 7 Mistakes with Food Storage
- Improper Storage Containers - See "How to Store Food Storage" above
- Improper Storage Location - See "Where to Store Food Storage" above
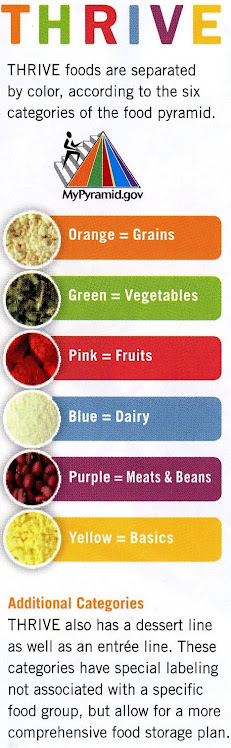
- No Variety, No Balance - Add THRIVE foods to your storage
- Lack of Water Storage or Filtering System - Always store enough water for a 2 weeks supply and a water filtering system for longer term needs. Many food storage items are freeze dried or dehydrated and require water to reconstitute them.
- Rotate and Use Your Food Storage - Make it part of your life. Store the foods you eat, eat the foods you store. If you eat 1 meal from your storage once a week you will rotate your 1 year supply every 7 years.
- Add Vitamins and other supplements for your personal needs.
- Have the necessary preparation and cooking equipment (wheat grinder, etc...) and have a reserve of fuel or optional way to cook your food.


.jpg)


No comments:
Post a Comment